We are continuing our quest to really “get” perimeter and area and today we did another investigation to try to really test our understanding. My plan was for a quick warm up to make sure we were crystal clear on the difference between perimeter and area (being day 4, I was hoping we were in the clear on this!) and to start to try to derive the formula. I talked with my team about the fact that when you look at the CCSS, the only thing it claims we need to do is USE the formula, and we talked about how important it is for us to continue to build understanding so we don’t raise a generation of students who just apply formulas like robots.
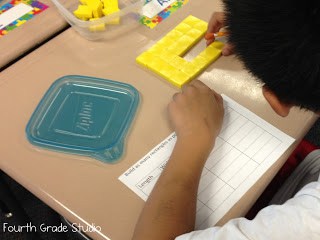
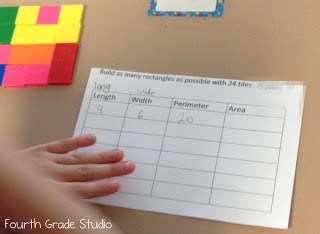
The warm up was simple–find all the different rectangles you can make with 24 tiles. I asked the students to fill out a table to record the different lengths, widths, perimeters, and areas and to REALLY look to see if they could find a pattern or a way to explain how to find the perimeters and areas WITHOUT counting.
The students were very comfortable building the different rectangles, although many of them got very “stuck” with the “short chubbies” and forgot to try the “long skinnies”! My favorite part of the warm up was one a student chimed out,
“Hey! This is just like when we learned how to find all the factors of a number!”
Silence. Then . . .
“Oh YEAH!!!!!!!!!!!”
Things moved quickly then and after a few more minutes I asked the students to team up and talk about how they could explain to someone how to find the perimeter and area of a rectangle without counting squares. I have to be honest, I thought this would be easier for them. Not so much.
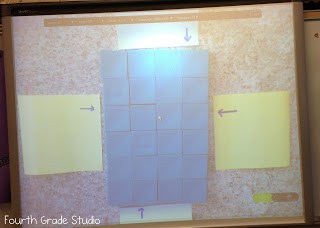
So I flipped this up under the document camera and asked the students what I had done.
They noticed that I had blue stickies by the short sides and yellow stickies by the long side. Finally someone got to the point where they could explain that there are two sets of sides that are the same. I asked how we could write that to find the perimeter. There were a few attempts, but nothing very coherent. I asked them to consider and discuss the following:
yellow + blue + yellow + blue = perimeter
Heads nodded in agreement. I then asked them to consider the following.
yellow + yellow + blue + blue = perimeter
Again. . . perfect agreement. I then asked them to talk together and see if they could come up with ANOTHER way to say it. Here were a few of our ideas:
side 1 + side 2 + side 3 + side 4 = perimeter
2 yellows + 2 blues = perimeter
2 groups of yellow + blue = perimeter
Not too shabby, right? I then asked if I could abbreviate any of the above like this:
2 lengths + 2 widths = perimeter
2 x (base + height) = perimeter
b + b + h + h = perimeter
Light bulbs were going off. I explained that mathematicians like to use abbreviations and symbols to “stand for” amounts because then we can put any amounts we want in. We tested our new “shortcuts” with the different lengths and widths we had found–and sure enough, the rule worked!
We repeated the process by deriving the area formula and practicing applying it. It was a great warm up (of about 30 minutes!), but it was a great way to dive into the word problems we did next. I’ll tell you about those tomorrow! Hope you had a great day! Today is the last day of the big sale, so I hope everyone found some great resources! I stocked up on a few new fonts and some clip art. Fun stuff!


